| Hoe vaak een deelnemer klassikaal of online geschoold wordt of een e-learning in eigen tijd volgt, kun je bepalen door het aantal onderdelen dat je toevoegt aan een opleidingssoort. Dit kun je ook wel zien als het lesprogramma, en kan bestaan uit dagen of dagdelen. Maar je kunt ook denken aan een uitgebreid lesrooster waarin je uur voor uur bepaalt wat voor les er gegeven wordt, door welke docent en in welk lokaal. Wellicht wil je duidelijk maken dat er een lunch en/of diner geserveerd wordt en dat er op het einde van de dag een borrel plaatsvindt. Maar misschien bepaal je dat er een eenvoudig lesrooster gemaakt moet worden. Bijvoorbeeld dag 1, dag 2 en op dag 3 in de ochtend les en in de middag een examen. Leg per onderdeel o.a. de vorm, standaard duur, minimum en maximum aantal deelnemers, presentie- en slagingsplicht vast. Koppel naar behoefte een standaard docent en/of locatie aan een of meerdere onderdelen. |
| De gegevens van het onderdeel worden vastgelegd in verschillende tabs. Welke tabs zichtbaar zijn is afhankelijk van de modules die voor jou zijn ingesteld en de rechten die je hebt gekregen. In dit artikel beschrijven we de tab 'Algemeen'. |
Video: |
| Met behulp van deze video zet je de tweede stap in het maken en inrichten van de opleidingssoort aan de hand van het voorbeeld 'Effectief vergaderen'. |
|
 | Bovenstaande video kun je het beste fullscreen bekijken. |
 | En in HD kwaliteit (1080p). Of dit zo is? Klik dan op dit icoontje. Daarmee kun je de kwaliteit ook wijzigen.
|
 | Sommige video's zijn in hoofdstukken opgedeeld. Welke dat zijn? Klik op dit icoontje. |
Maak het onderdeel en leg algemene gegevens vast. |
| Heb je de opleidingssoort nog niet geopend? Klik dan op de naam van de opleidingssoort in het zoekscherm. | 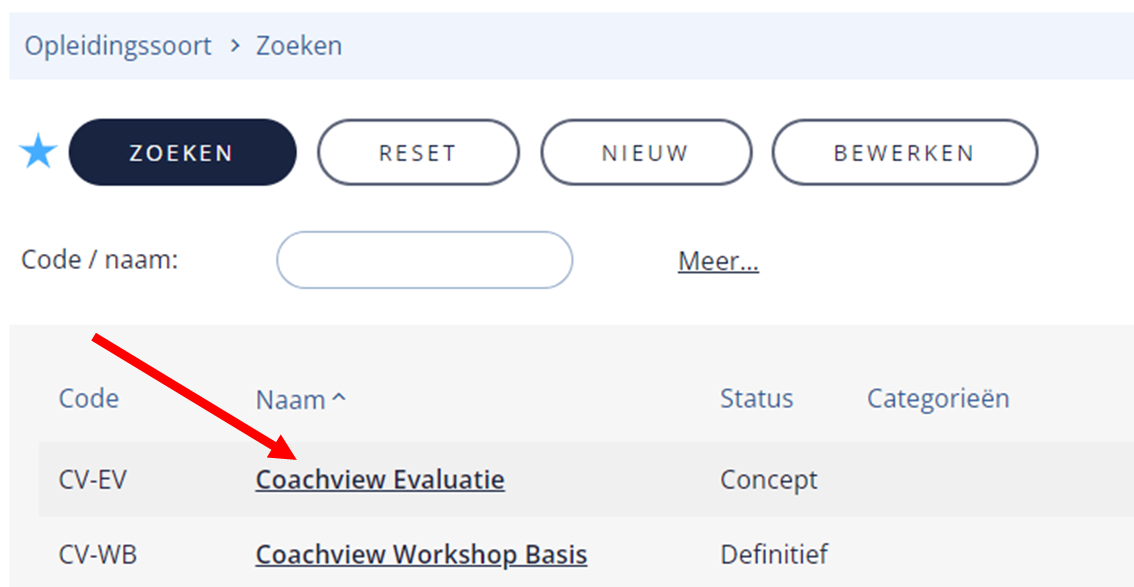 |
| Klik op de tab 'Onderdelen'. | 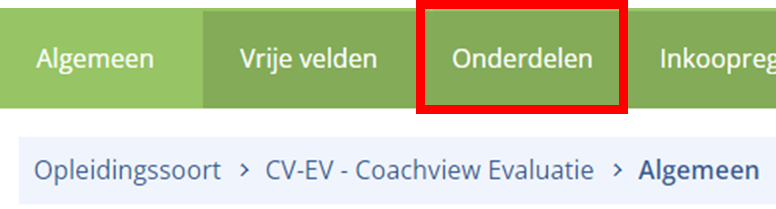 |
| Klik op de knop 'Nieuw'. | 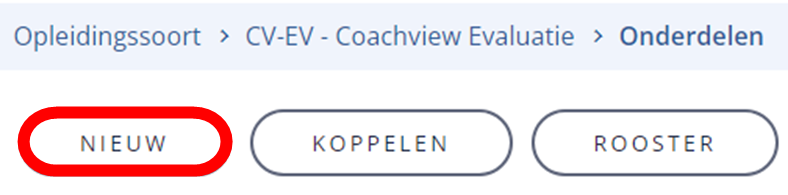 |
| Code (verplicht): | Gebruik de code van de opleidingssoort en voeg een volgnummer toe. Bijvoorbeeld TCV-01, TCV-02, TCV-03O (ochtend) en TCV-03M (middag). Maar wellicht gebruik jij al codes en wil je die gebruiken. Zorg ervoor dat elke code uniek is. |
| Naam (verplicht): | Het gaat hier om de (algemene) naam van de les. Je kunt bijvoorbeeld invullen: ‘Dag 1: inleidende college’ of alleen 'Dag 1' of alleen 'Inleidende college'. De namen van de onderdelen kun je laten terugkomen op het lesprogramma of op de presentielijst. |
| Omschrijving: | Beschrijf de leertaak voor bijvoorbeeld de docent of vul in informatie voor de deelnemer over voorbereiding of meenemen extra materiaal. |
| Lesvorm: | Je hebt de keuze tussen 'klassikaal', 'e-learning / digitaal' of 'Virtual classroom'. |
 |
| Selecteer je 'e-learning' dan verschijnt de optie om aan te geven aan welk e-learning systeem je wilt koppelen (1). Daarnaast geef je op voor welke cursus of examen ingeschreven moet worden in het e-learningsysteem (2). |
 |
| Selecteer je 'Virtual classroom' dan heb je de mogelijkheid om de digitale locatie als URL voor bijvoorbeeld Teams, Zoom of Meet vast te leggen bij het onderdeel dat is gestempeld bij de opleiding. De digitale locatie kun je als samenvoegcode toevoegen in een documenttemplate en is dus direct beschikbaar in de communicatie rondom de opleiding. |
| Duur in uren: | Dit is het aantal uren per dag dat een deelnemer les heeft. De duur kun je gebruiken in bijvoorbeeld de communicatie. Vul je bij het plannen van de opleiding de 'tijd van' in? Dan zal Coachview automatisch de 'tijd tot' bepalen en invullen aan de hand van het aantal ingevulde uren. |
| Voorbeeld ingestelde duur in uren is 8,5. | 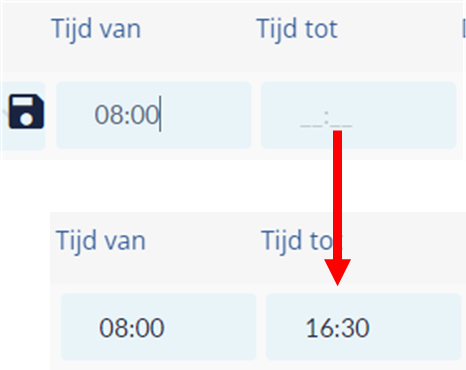 |
| Tijd van: | Standaard begin tijd van de les.
Let op: niet invullen als de begin tijd vaak wisselt, deze kun je dan bij de opleiding invullen. |
| Tijd tot: | Standaard eind tijd van de les.
Let op: niet invullen als de eind tijd vaak wisselt, deze kun je dan bij de opleiding invullen. |
| Min. deelnemers: | Het minimum aantal is belangrijk met het oog op het al dan niet laten doorgaan van een cursus. Zet je de opleiding op 'Definitief', de opleiding gaat door, dan krijg je een waarschuwing als er niet voldoende deelnemers zijn ingeschreven. Deze waarschuwing kun je negeren. |
| Max. deelnemers: | Het maximum aantal deelnemers. Is het maximum bereikt bij de opleiding en schrijf je handmatig nog een deelnemer in dan volgt een melding. Deze mag je negeren. Schrijf je een deelnemer in die zich heeft aangemeld via de website/opleidingsportaal dan wordt deze automatisch op de wachtlijst geplaatst. Het is dan nog mogelijk om deze deelnemer alsnog via de wachtlijst in te schreven. |
| Dagen na het vorige onderdeel: | Maak je gebruik van roosteren, maar wordt de opleiding niet elke dag, week of maand gegeven?
Geef dan hier het aantal dagen na het vorige onderdeel.
Voorbeeld: het eerste onderdeel begint op 12-12-24, in het tweede onderdeel staat '5 dagen na'. Bij het roosteren wordt dag 2 op 17-12-24 gepland. In het derde onderdeel staat '3 dagen na'. Dag 3 wordt dan gepland op 20-12-24. |
| Studiebelasting: | Het aantal uren dat een gemiddelde deelnemer nodig heeft voor de voorbereiding van de les. Te gebruiken voor communicatie doeleinden. |
| Presentieplicht: | Selecteer deze optie als je bij de opleiding de presentie (ja/nee) wilt bijhouden. Het invullen is dan verplicht. Handig als het automatisch versturen van een certificaat vanuit Coachview afhankelijk is of de deelnemer heeft voldaan aan de presentieplicht. In de DocentApp ziet de docent dat presentie ingevuld dient te worden. |
| Slagingsplicht: | Selecteer deze optie als je in de opleiding bij een examen de slaging (ja/nee) wilt bijhouden. Het invullen is dan verplicht. Voor het verkrijgen van een certificaat moet de deelnemer voldoen aan de presentieplicht en moet geslaagd zijn. In de DocentApp ziet de docent dat slaging ingevuld dient te worden. |
In de opleiding ziet dit er zo uit:
 |
| Inactief: | Wordt het onderdeel niet meer gebruikt en kun je deze niet verwijderen selecteer dan deze optie. |
Heb je alle gegevens ingevuld?- Klik op 'Opslaan & Terug' om het onderdeel te bewaren en terug te keren naar de lijst met onderdelen.
- Klik op 'Nieuw' om het volgende onderdeel te maken. Als je een nieuw onderdeel gaat toevoegen dan worden automatisch de gegevens die je in het vorig onderdeel hebt ingevuld overgenomen, met uitzondering van code en naam. Indien nodig kun je deze gegevens wijzigen.
|
|
| Let op: | De status van de opleidingssoort wordt bij het toevoegen van het eerste onderdeel automatisch op 'definitief' gezet en daarmee mag de opleidingssoort gebruikt worden voor het stempelen van een opleiding of aanvraag. Wil je dit niet? Dan kun je zelf de status terugzetten op 'concept' via tab 'Algemeen'. |
Voeg een of meerdere locaties / locatie rollen toe. |
Voeg een of meerdere locatierollen toe als bij het plannen van de opleiding verplicht een of meerdere locaties geselecteerd moeten worden die voldoen aan bepaalde eisen. Denk bijvoorbeeld aan de rol theorie, aanwezigheid van computers, bioscoop opstelling etc.
Let op: je moet locatie rollen en locaties wel eerst hebben ingericht! Lees hier meer. |
- Open het onderdeel en ga naar de tab 'Locaties'.
- Klik op de knop 'Nieuw'.
- Met behulp van het vergrootglas kun je nu een loctierol toevoegen.
- Klik op 'Opslaan & Terug' om nog een locatierol toe te voegen.
| 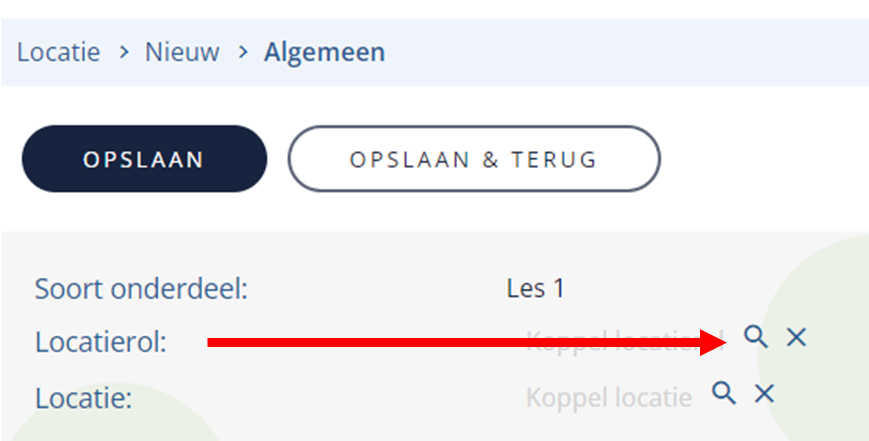 |
Voeg een locatie toe als de les altijd in dit lokaal gegeven wordt:- Open het onderdeel en ga naar de tab 'Locaties'.
- Klik op de knop 'Nieuw'.
- Met behulp van het vergrootglas kun je nu een locatie toevoegen.
- Klik op 'Opslaan & Terug' om nog een locatie toe te voegen.
| 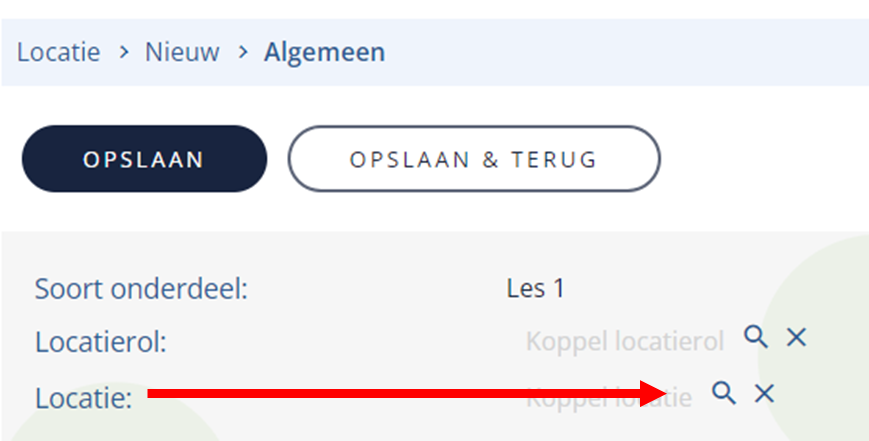 |
Wil je de locatierol en/of locatie verwijderen?
- Klik op de naam van de lcoatie of locatierol.
- Klik op 'Bewerken'.
- Klik op 'Verwijder' en 'OK'.
|
Voeg een of meerdere docenten / docentrollen toe. |
Voeg een of meerdere docentrollen toe als bij het plannen van de opleiding verplicht een of meerdere docenten geselecteerd moeten worden die voldoen aan bepaalde eisen. Denk bijvoorbeeld aan de rol examninator, veiligheidsdeskundige, gevorderd etc.
Let op: je moet docent rollen en docenten wel eerst hebben ingericht! Lees hier meer. |
- Open het onderdeel en ga naar de tab 'Docenten'.
- Klik op de knop 'Nieuw'.
- Met behulp van het vergrootglas kun je nu een docentrol toevoegen.
- Klik op 'Opslaan & Terug' om nog een docentrol of docent toe te voegen.
| 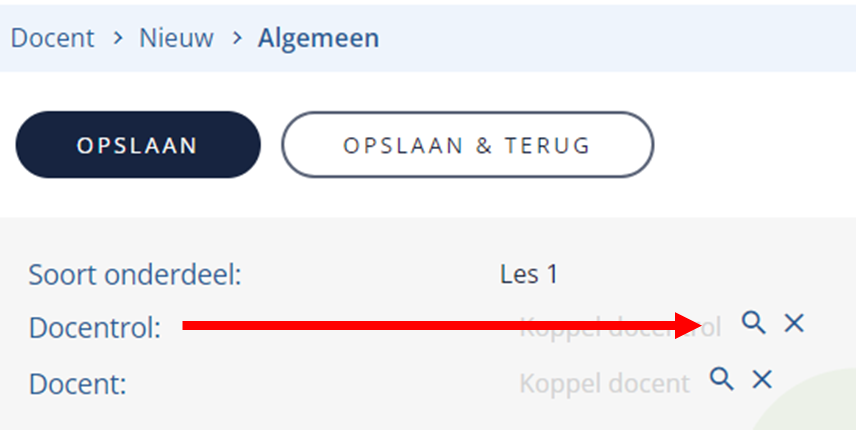 |
Voeg een docent toe als de les altijd door deze docent gegeven wordt:
- Open het onderdeel en ga naar de tab 'Docenten'.
- Klik op de knop 'Nieuw'.
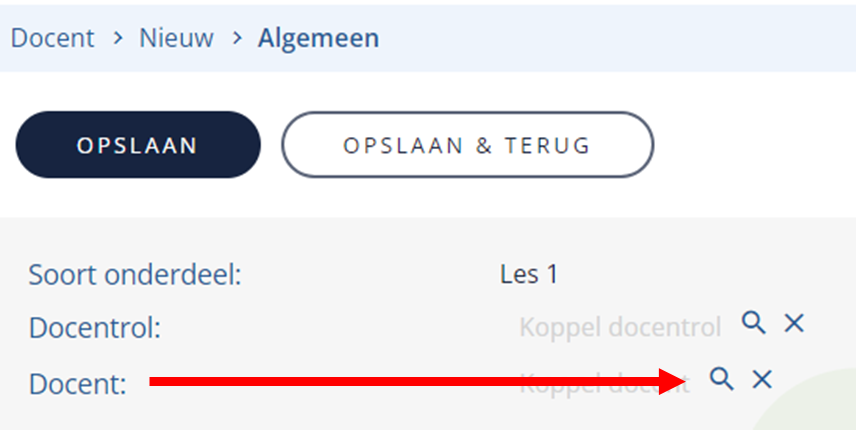
- Met behulp van het vergrootglas kun je nu een docent toevoegen.
- Klik op 'Opslaan & Terug' om nog een docent toe te voegen.
|
 |
Wil je de docentrol en/of docent verwijderen?- Klik op de naam.
- Klik op 'Bewerken'.
- Klik op 'Verwijder' en 'OK'.
|
Ontkoppel (verwijder) een onderdeel uit de opleidingssoort. |
- Klik op de tab 'Onderdelen'.
- Klik op de knop 'Bewerken'.
- Selecteer de onderdelen die ontkoppeld moeten worden.
- Klik op de knop 'Verwijder' en 'OK'.
Maar let op:- De geselecteerde onderdelen worden alleen ontkoppeld, niet verwijderd. Wil je het onderdeel verwijderen? Dan kan dat via menu 'Opleidingsdata' en menu-item 'Soortonderdeel'. Echter, dit kan alleen als het soortonderdeel niet is gebruikt als opleidingsonderdeel, aanvraagonderdeel op opleidingsvraag onderdeel.
- Heeft de opleidingssoort de status 'Definitief'? Dan kan het laatste overgebleven onderdeel niet meer ontkoppeld worden. Wil je dit toch? Zet dan de status op 'Concept'.
|
Koppel een onderdeel uit een andere opleidingssoort: |
| Als je een onderdeel uit een andere opleidingssoort koppelt kun je bijvoorbeeld een deelnemer uit opleiding A versplaatsen naar het onderdeel in bijvoorbeeld opleiding B. Let op: verander je gegevens in dit onderdeel, dan verandert dit voor elke opleidingssoort waaraan dit onderdeel is gekoppeld. |
- Klik op de tab 'Onderdelen'.
- Klik op de knop 'Koppelen'.
- Een pop-upscherm met soortonderdelen wordt geopend.
- Zoek en selecteer het te koppelen soortonderdeel.
- Klik op 'Toevoegen'.
|
Het is mogelijk om meerdere keren hetzelfde onderdeel toe te voegen.- Selecteer het soortonderdeel.
- Vul het aantal in naast de toevoegen knop.
- Klik op 'Toevoegen'.
|
| Info: | Met de knop ‘Rooster’ kun je een roosterpatroon instellen. Bijvoorbeeld de opleiding vindt elke week plaats op een maandag. Meer weten? Ga snel naar het artikel over roosteren, deze vind je hier. |
Bijgewerkt tot en met versie 85
