Via de menu-groep ‘Plannen’ en menu-item‘Internetagenda’ richt je één of meerdere internetagenda’s in.
Je kunt internetagenda’s aanmaken op drie niveaus:- Algemeen: dit zijn alle of een beperkt aantal opleidingen.
- Docent: alle opleidingen waar de gekozen docent is ingepland.
- Persoon: alle opleiding(en) waar de deelnemer is ingeschreven.
|
|
Maak een nieuwe algemene internetagenda in Coachview:: |
Een algemene internetagenda koppelt alle of een beperkt aantal opleidingen aan bijvoorbeeld jouw of een algemene agenda. Het is mogelijk om meerdere internetagenda’s te maken. Je kunt dus ook voor meerdere collega's, denk aan de receptie, catering, facilitair bedrijf of managers, een internet agenda aanmaken en koppelen.
Je bepaalt zelf welke opleidingen getoond worden:- Alle opleidingen.
- Alleen die opleidingen die gemaakt zijn met behulp van een specifieke opleidingssoort.
- Alleen die opleidingen die gemaakt zijn met behulp van een of meerdere opleidingssoorten, gebundeld met behulp van een opleidingssoortcategorie.
- Alleen die opleidingen waarvan een of meerdere onderdelen in een bepaalde locatie zijn gepland.
|
Handmatig aanmaken van een algemene internetagenda:- Klik in menu-groep ‘Plannen’ op menu-item 'Internetagenda' en je komt in de overzichtslijst met agenda’s terecht.
- Klik op de knop ‘Nieuw’.
|
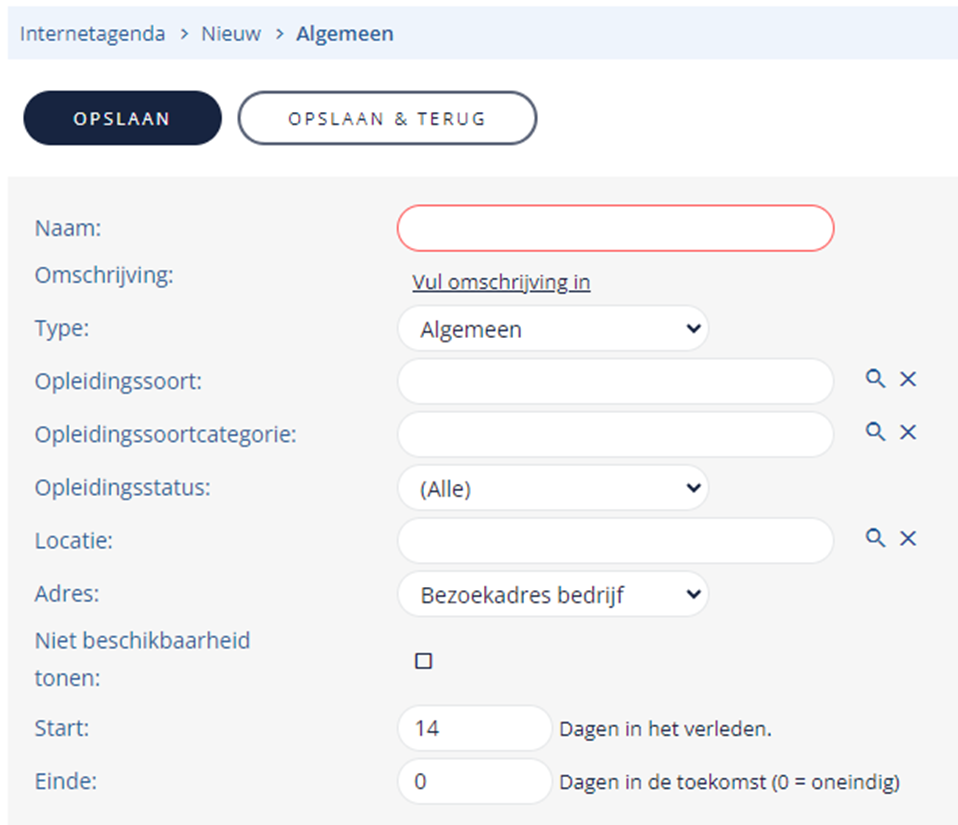
- Vul een naam in voor de agenda, deze zie je terug als kalendernaam in jouw agenda en is verplicht.
- Vul eventueel een omschrijving in. De omschrijving zie je alleen terug in Coachview.
- Kies als type ‘Algemeen’.
- Selecteer een opleidingssoort als alleen die opleidingen gemaakt met deze opleidingssoort in de externe agenda getoond mogen worden.
- Selecteer een opleidingssoortcategorie als alleen die opleidingen in de externe agenda getoond mogen worden gemaakt met opleidingssoorten die deze categorie hebben gekregen.
- Selecteer een Opleidingsstatus als alleen opleidingen met een bepaalde status (lopend, te starten, definitief, uitgevoerd, afgerond, geannuleerd) in de externe agenda getoond mogen worden. Kies (alle) als de Opleidingsstatus geen selectiecriterium is. Let op: de status 'Lopend' is niet een status die je bij een opleiding kunt kiezen, maar dit is een samenvoeging van de statussen 'te starten', 'definitief' en 'uitgevoerd'.
- Selecteer een locatie als alleen die opleidingen in de externe agenda getoond mogen worden waarvan een of meerdere onderdelen in deze locatie zijn gepland.
- Selecteer het adres van de locatie wat in de externe agenda getoond mag worden. Je kunt hier kiezen uit het bezoekadres, postadres, factuuradres of overig adres.
- Geef aan of de niet-beschikbaarheid getoond moet worden (= aanvinken).
- Geef aan hoeveel dagen in het verleden (start) en toekomst (einde) getoond moeten worden.
- Klik op ‘Opslaan’ of 'Opslaan & Terug' om jouw agenda te bewaren.
|  |
| In de Algemene externe agenda vind je naast de informatie van de opleiding (naam, locatie en docent) ook terug hoeveel plaatsen er bezet zijn. Hiermee kun je externe locaties en leveranciers eenvoudig op de hoogte stellen van de groepsgrootte voor oa het regelen van de lunch of boekenpakketten. | 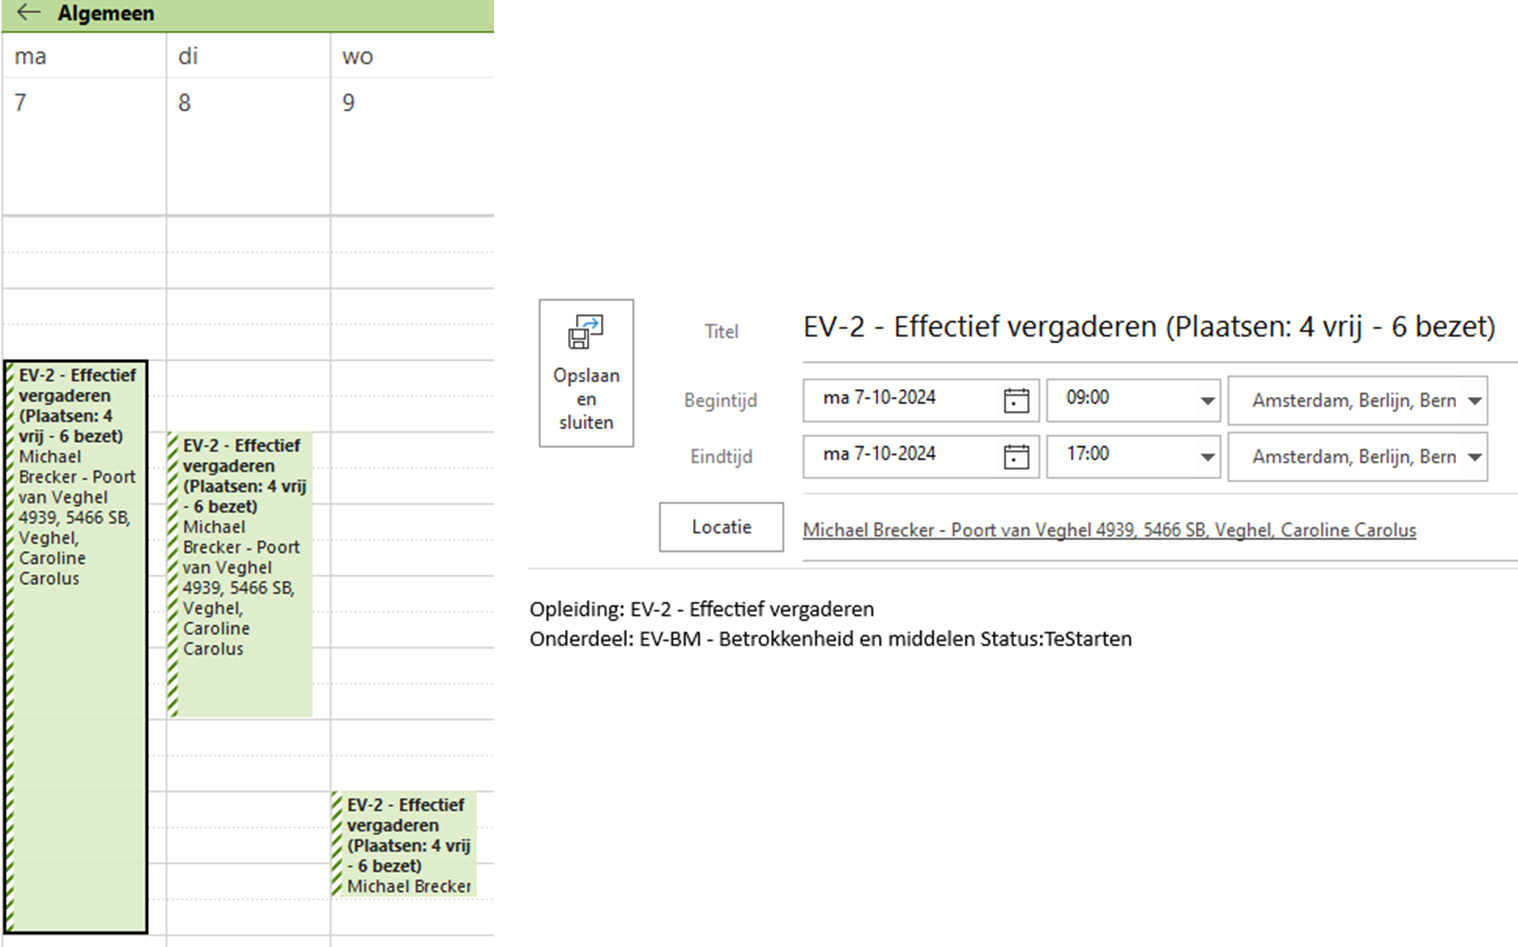 |
|
Maak een nieuwe internetagenda voor een docent: |
| Een internetagenda voor een docent koppelt alleen die opleidingensonderdelen waarop de docent is ingepland en waarvan de opleiding niet geannuleerd is. Het is mogelijk om per docent een agenda te maken. |
Methode 1 (handmatig aanmaken):- Klik in menu-groep ‘Plannen’ op menu-item 'Internetagenda' en je komt in de overzichtslijst met agenda’s terecht.
- Klik op de knop ‘Nieuw’.
|
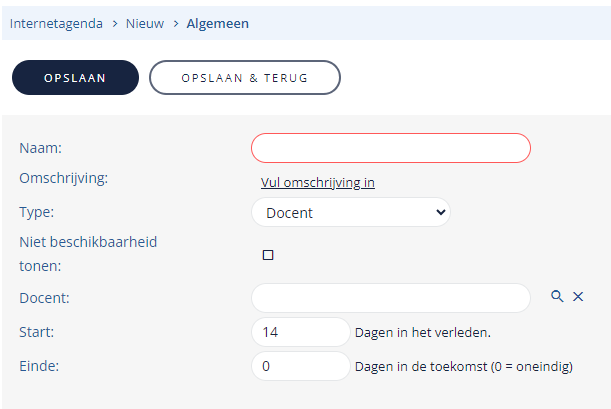
- Vul een naam in voor de agenda, deze zie je terug als kalendernaam in jouw agenda en is verplicht.
- Vul eventueel een omschrijving in. De omschrijving zie je alleen terug in Coachview.
- Kies als type 'Docent', de in te vullen gegevens veranderen.
- Geef aan of de niet-beschikbaarheid van de docent getoond moet worden (=aanvinken).
- Selecteer de docent door de achternaam in te vullen en de docent te selecteren uit de lijst of klik op het loepje om de docent te zoeken en te selecteren.
- Geef aan hoeveel dagen in het verleden (start) en toekomst (einde) getoond moeten worden.
- Klik op 'Opslaan' of 'Opslaan & Terug' om jouw agenda te bewaren.
|
 |
Methode 2 (automatisch aanmaken):- We gaan de uitnodiging voor het koppelen van de internetagenda via e-mail naar de docent versturen.
- Maak een nieuwe document template en kies daarbij als template uit bibliotheek 'Planning internetagenda voor docent'.
- Een voorbeeld document template wordt voor je gemaakt, pas deze naar behoefte aan.
- Selecteer een docent via menu-groep ‘Relaties’ en de menu-item ‘Docent’.
- Klik op de tab ‘Documenten’ in de detailscherm van de docent.
- Maak een nieuw document met behulp van de zojuist gemaakte document template door op de knop ‘Nieuw’ te klikken.
- Selecteer deze document template.
- Klik op ‘Opslaan’, mail de uitnodiging en de internetagenda wordt automatisch gemaakt.
- Controleer of de internetagenda is aangemaakt via de menu-groep ‘Planning’ en de menu-item ‘Internetagenda’.
Tip: via menu-groep 'Communicatie' en menu-item 'Mailing' kun je meerdere docenten tegelijkertijd mailen. |
| Tip: een alternatief voor deze internetkoppeling voor een docent is onze DocentApp. Deze app geeft realtime inzicht in de planning en helpt docenten zo goed mogelijk op weg. Docenten registreren in de app presentie en slaging en kunnen zelf bijhouden wanneer ze afwezig zijn. Meer weten? Kijk dan hier op onze kennisbank. |
Maak een nieuwe internetagenda voor een deelnemer: |
| Een internetagenda voor een deelnemer koppelt alleen die opleidingensonderdelen waarop de deelnemer is ingeschreven en waarvan de opleiding niet geannuleerd is. Het is mogelijk om per deelnemer een agenda te maken. |
Methode 1 (handmatig aanmaken):- Klik in menu-groep ‘Plannen’ op menu-item 'Internetagenda' en je komt in de overzichtslijst met agenda’s terecht.
- Klik op de knop ‘Nieuw’.
|
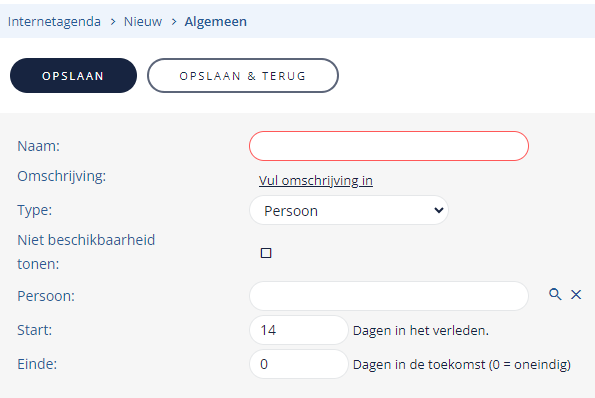
- Vul een naam in voor de agenda, deze zie je terug als kalendernaam in jouw agenda en is verplicht.
- Vul eventueel een omschrijving in. De omschrijving zie je alleen terug in Coachview.
- Kies als type 'Persoon', de in te vullen gegevens veranderen.
- Selecteer de deelnemer door de achternaam in te vullen en de deelnemer te selecteren uit de lijst of klik op het loepje om de deelnemer te zoeken en te selecteren.
- Klik op 'Opslaan' of 'Opslaan & Terug' om jouw agenda te bewaren.
|
 |
Methode 2 (automatisch aanmaken):- Maak een document template met als datagroep ‘OpleidingsDeelnemer’.
- Open de lijst met samenvoegcodes en vink 'Alleen meest gebruikte velden tonen' uit.
- Kies uit de map ‘OpleidingDeelnemer' de map ‘Internetagenda’.
- Kies uit het lijstje de samenvoegcode ‘Webcal’.
- Bovenstaande samenvoegcode is nodig voor de koppeling.
- Sla de document template op.
- Selecteer de opleiding waarvan jij van de deelnemers automatisch een agenda in Coachview.net wilt maken.
- Klik op de tab ‘Deelnemers’ in detailscherm van de opleiding.
- Klik op de knop ‘Mailings’.
- Selecteer de document template.
- Klik op ‘Opslaan’.
- Verwijder via de knop ‘Bewerken’ die deelnemers waarvan geen agenda in Coachview.net gemaakt moet worden.
- Klik op de knop ‘Print’ en ‘Genereer’ of op de knop ‘Email’ en ‘Emailen’ en de internetagenda wordt automatisch gemaakt.
|
Bijgewerkt tot en met versie 86
